HIKVISON NVR Adding and Connecting the IP Cameras
HIKVISON NVR Adding and Connecting the IP Cameras
Purpose:
Before
adding the camera, make sure the IP camera
to be added is in active status.
Step 1 Select the Add IP Camera option from the right-click menu
in live view mode or
click Menu
> Camera
> Camera to enter the IP camera management interface.
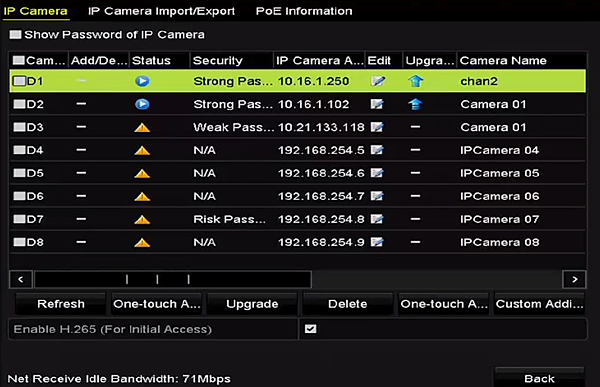
For
the IP camera detected online in the same network segment,
the Password status shows
whether it is active or inactive.
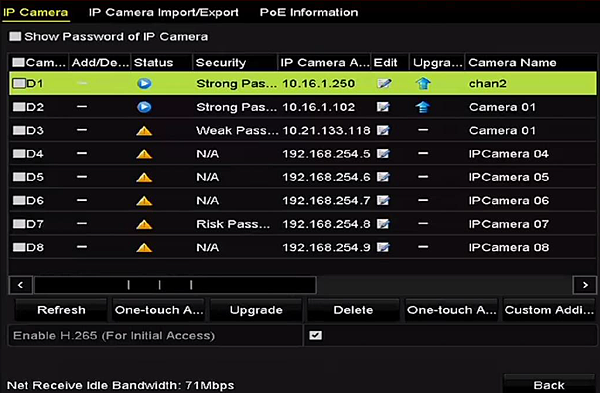
Step 2
Click the inactive icon of the camera to
enter the following interface to activate it.
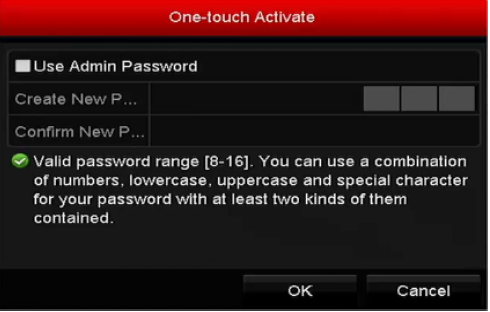
You can also select multiple cameras from the list and
click the One-touch Activate to activate the cameras in batch
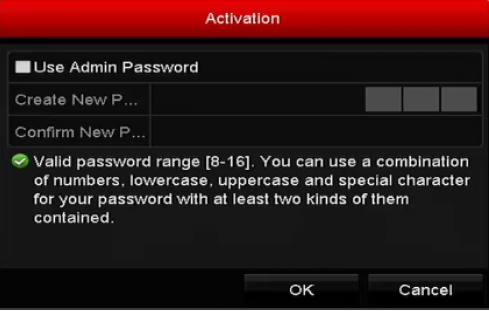
Step 3 Set the password of the camera to activate it.
Use Admin Password:
when you check the checkbox , the cam era ( will be configured with
the same admin password of the operating NVR.
Create New Password:
If the admin password is not used, you must create the new password
for the camera and confirm it.
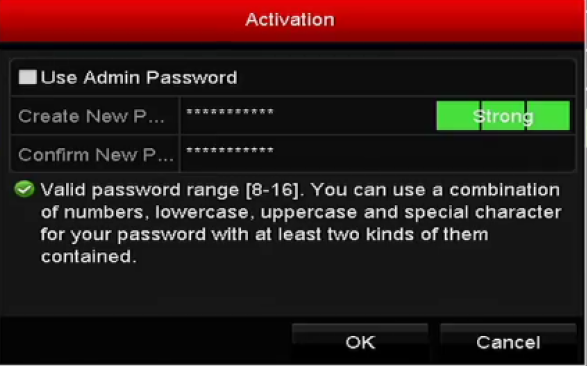
WARNING:
Strong Password recommended
We hig hly recommend you create a strong password of your own
choosing
(Using a minimum of 8 characters,
including at least three of the following categories:
upper case letters, lower case letters, numbers, and special characters.)
in order to increase the
secur ity of your product.
And we recommend you reset your password regularly, especially in the
high security system, resetting the password monthly or weekly can better protect your product.
Adding the Online IP Cameras
Purpose:
The main function of the NVR is to connect the network cameras and record the video got from it.
So before you can get a live view or record of the video,
you should add the network cameras to the connection list of the device.
Before you start:
Ensure the network connection is valid and correct.
For detailed checking and configuring of the network,
please see Chapter Checking Network Traffic and Chapter Configuring Network Detection Detection
Adding the IP Cameras
OPTION 1:
Step 1
Click to select an idle window in the live view mode
Step 2
Click the + icon in the center of the windw to pop up the adding IP camera interface

Step 3
Select the detected IP camera and click the Add button to add it directly,
and you can click
the Search button to refresh the online IP camera manually
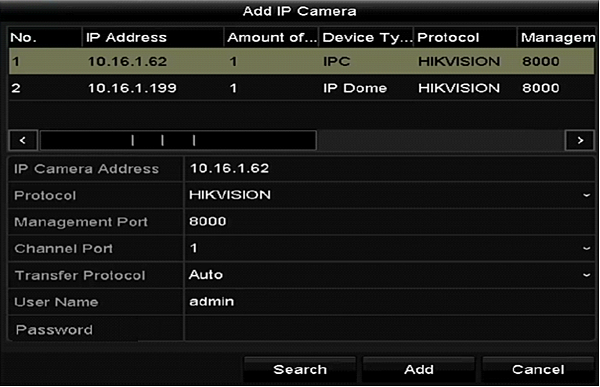
Or you can choose to custom add the IP camera by editing the parameters in the
corresponding textfiled and then click the Add button to add it.
OPTION 2:
Step 1
Select the Add IP Camera option
from the right-click menu in live view mode or click Menu>
Camera> Camera to enter the IP camera management interface
Step 2
The online cameras with same network segment will be detected
and displayed in the camera list.
Step 3 Select the IP camera from the list and click the
button to add the camera. Or you can click the +
One-touch Adding button to add all cameras
(with the same login password) from the list.
NOTE:
ake Msure the camer
a to add has already been activa ted.
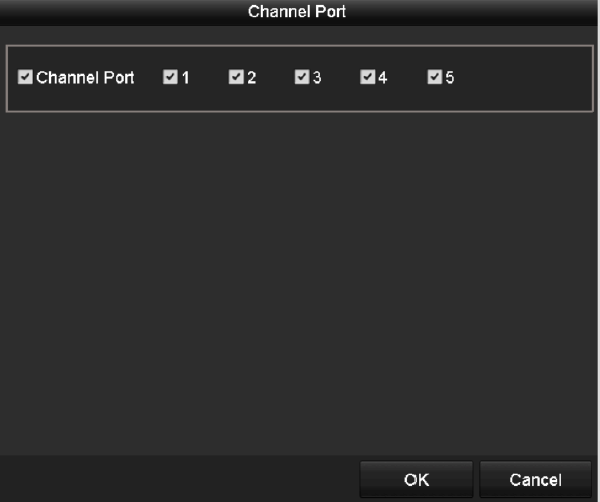
Step 4 (For the encoders with multiple channels only)
check the Channel Port checkbox in the pop-up window,
as shown in the following figure, and click OK to add multiple channels
OPTION 3:
Step 1 On the IP Camera Management interface,
click the Custom Adding button to pop up the Add IP Camera (Custom) interface
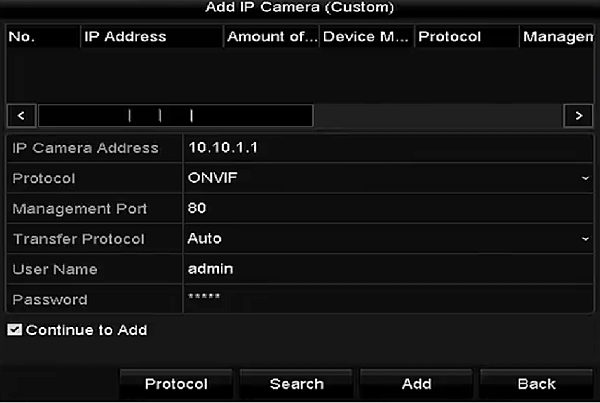
Step 2 You can edit the IP address, protocol, management port,
and other information of the IP camera to be added.
NOTE:
If the IP camera to add has not been actiav
a ted, you can activate it from the IP camera list on the
camera management interface.
Step 3
(Optional) Check the checkbox of Continue to Add to add other IP cameras.
Step 4
Click Add to add the camera. The successfully added cameras are listed in the interface.
Refer
to the following table for the description of the icons


留言